I understood the usefulness of Clap, but how to make a video?
Once you’ve created your account, you can start your first project! To do this, we guide you in 5 steps.
In order to guide you in writing your film, we are going to take the example of a report about a report that will deal with gender equality at school.
The 5 steps in video
Summary of steps in drawings
Theme

Storyboard

Scenario
Filming plan

Sequence

Step 1: identify a theme
The first step in creating a video is to determine its theme, that is, its subject or the general idea of the mini-report. What will your video be about? You can choose from the proposed list or create new ones!
For this example, we have decided to choose the theme “The challenges of our society”.


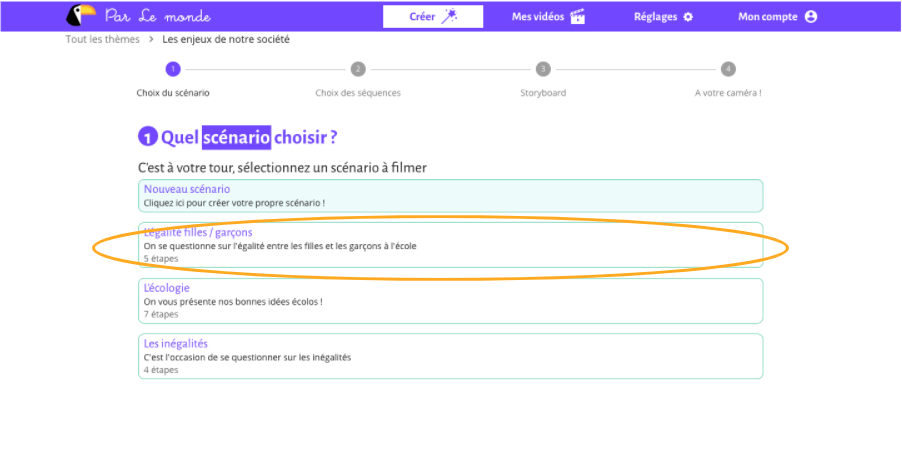
Step 2: choose the scenario
Once the theme has been chosen, it’s time to write the screenplay!
The scenario is how we want to deal with our theme, the story we are going to tell.
To do this, all you have to do is click on an already proposed scenario or create your own.
At this stage, you have to think about what you want to tell and how. Indeed, the same subject can be told from different angles: from a pupil’s point of view, chronologically, through interviews… Let the Spielberg in you express itself!
In our case, we will deal here with gender equality in the form of a short interview.
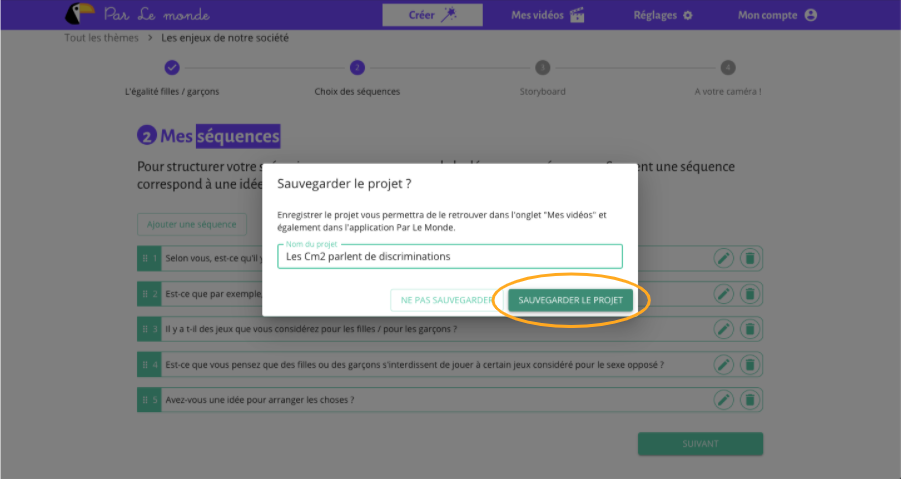
At this step, you are offered to save your project. To do this, you have to give it a name. You can then find your drafts in the “My videos” tab. We will see this in more detail in the next lesson!
Some examples of other scenarios in this theme
- Introducing an ecological initiative in your classroom
- Discussion among children on inequalities
- Visit of a sorting center in your village
Don’t hesitate to take a stroll on Clap! to discover the different scenarios already offered in the different themes!
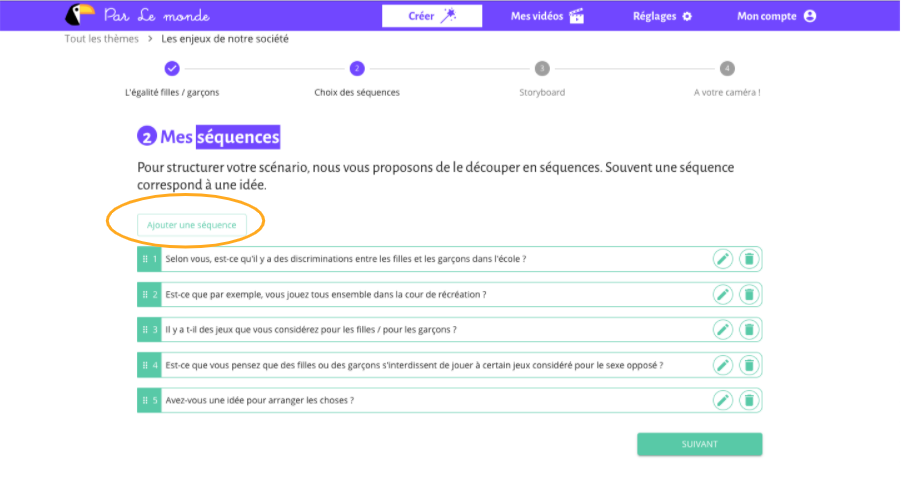
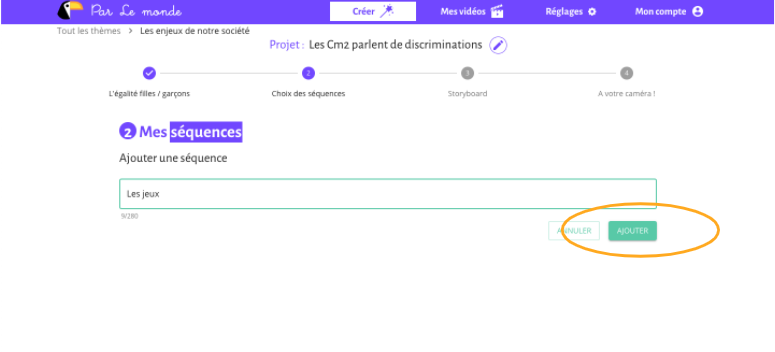
Step 3: define the sequences
Once the overall scenario has been chosen, the class will wonder about the concrete content of the report. For this we will cut our story into sequences.
A sequence corresponds to an idea, like a paragraph in a text.
The small green squares on the left of the screen allow you to easily move the sequences. The small green pen on the right allows you to modify a title, if you have made a small typo for example. And the trash can, delete it!
In our case, we chose to do an interview, so we formulated our ideas in the form of questions, to which each answer will correspond to a filmed sequence. It can be a great way to organize your movie! Of course there are plenty of others.

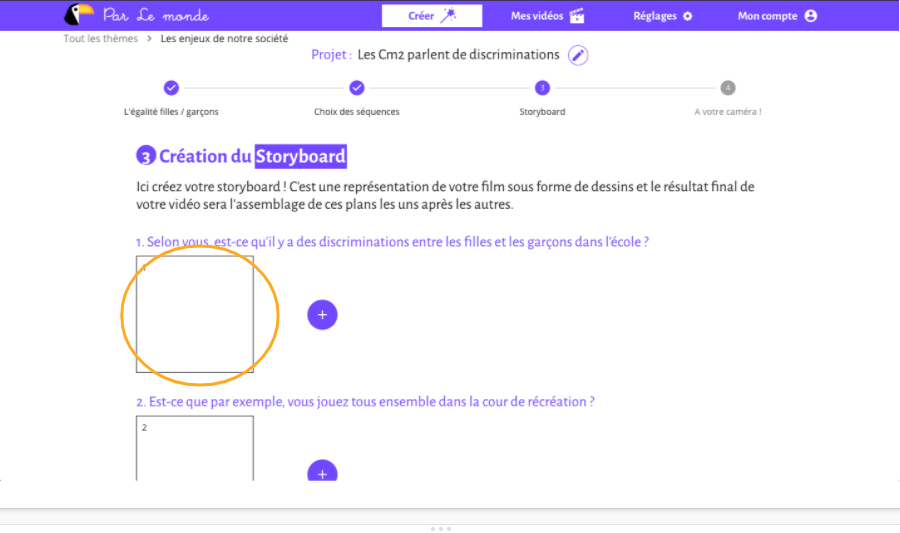
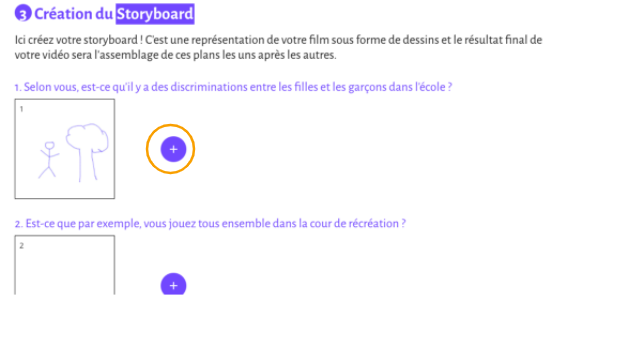
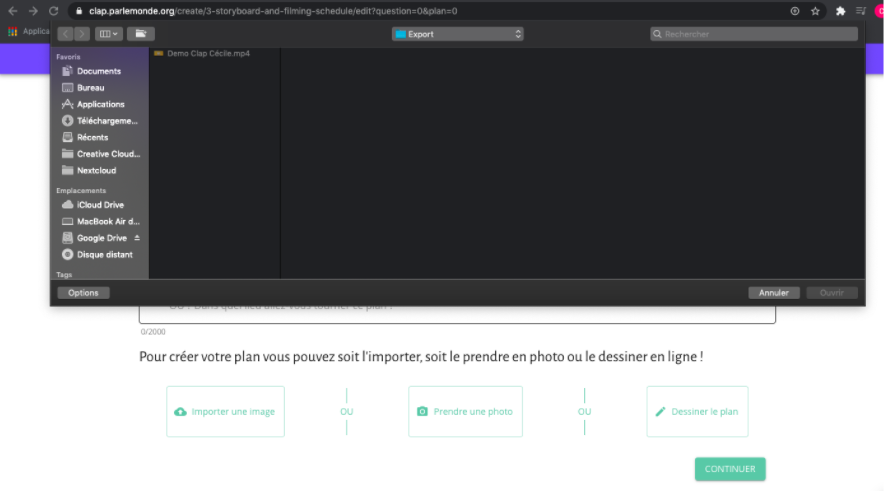
Step 4: create the storyboard
Last step before filming!
This space is used to organize the shooting of the video. Indeed, the storyboard corresponds to the course of your film.
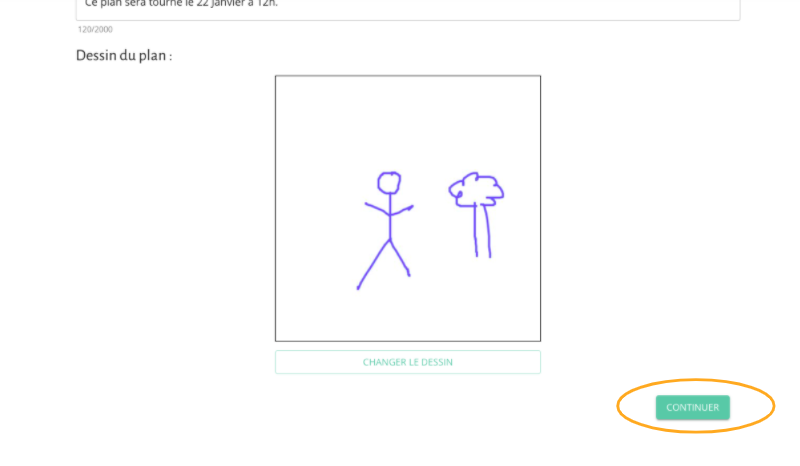
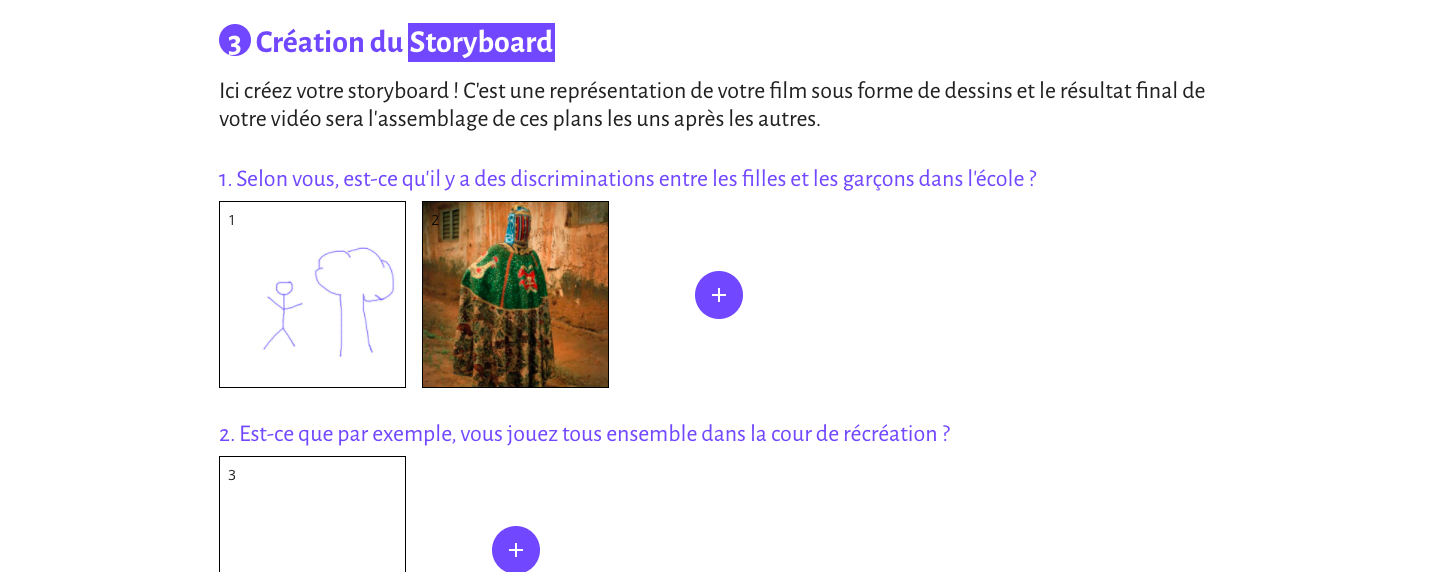
In this space you can see different squares. In fact, the squares correspond to plans. We said earlier that sequences could correspond to paragraphs and well, squares could correspond to sentences!
Create a sequence shot.
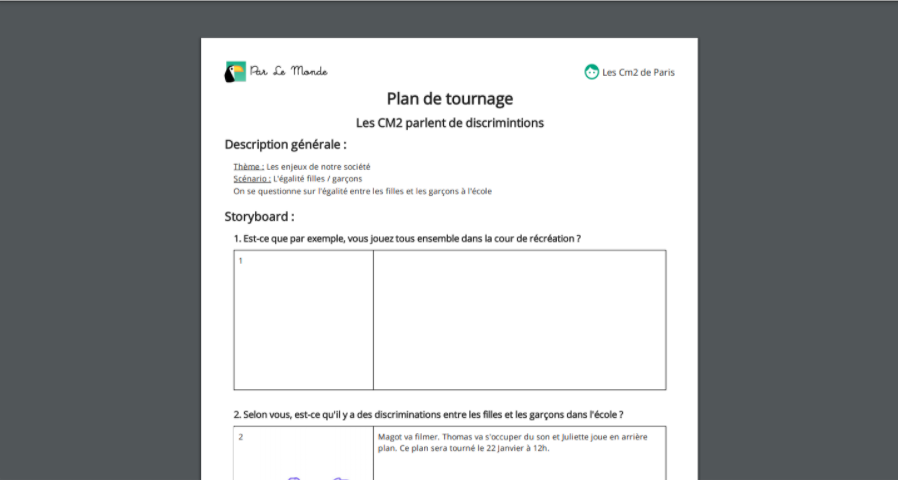
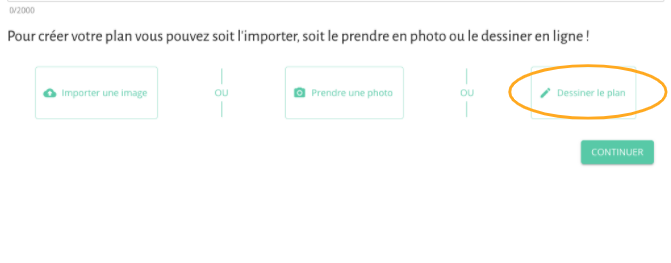
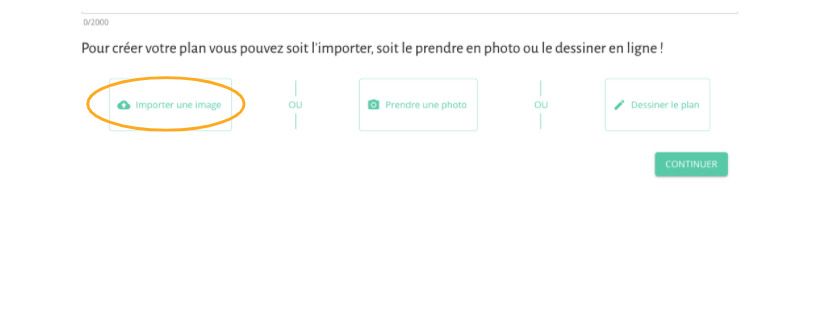
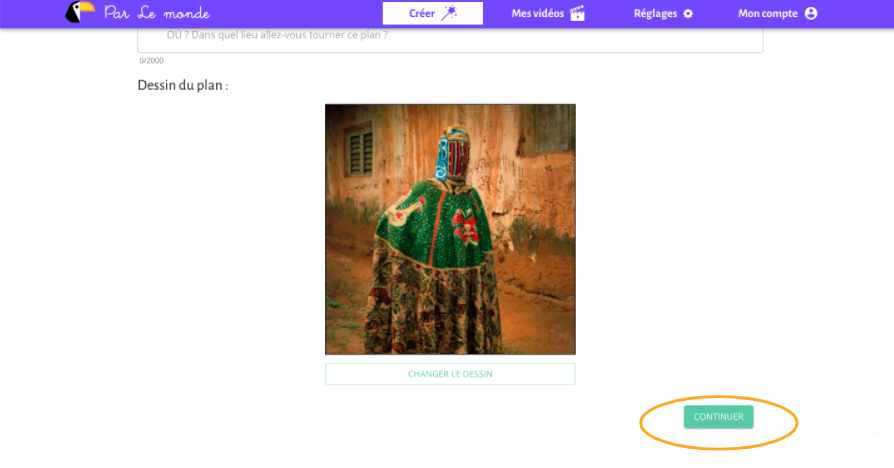
For example here, the sequence “In your opinion, is there discrimination between girls and boys in school?” will be illustrated by a plan. For each plan, you can annotate, draw, assign roles. These are so many indications that will help you during the filming. To do this, you can click on each square and then fill with your indications as in this example.
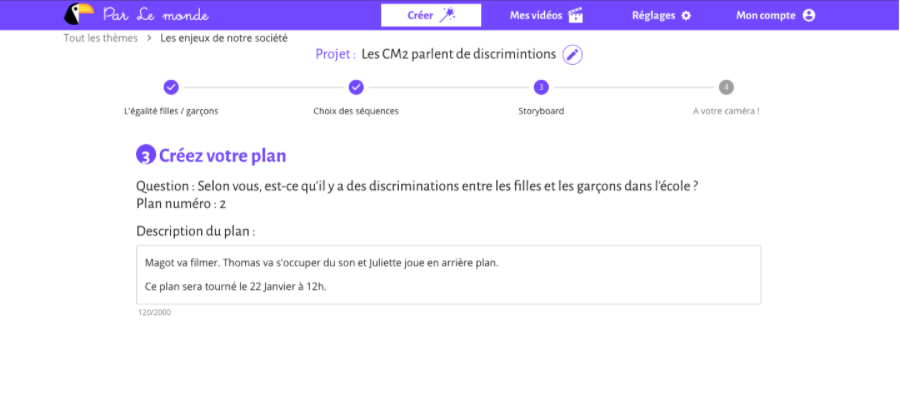

Or several shots in a sequence!
Sometimes you may want to illustrate a sequence with several shots. This is what we can see in this example.
Step 5: Use the filming plan
The filming plan is the tool that you can use to guide you during the filming. Indeed, you will find there all the indications of the storyboard.
Each student can thus know what to do, with whom and when.
This sheet can be downloaded as a PDF, printed and distributed to the whole class.